Many of our customers need to implement their workflows developing highly customized web applications integrated with third-party applications like CRM, collaboration Suites as Google Workspace and external databases. And of course we need to guarantee that those applications are secure, modern and performant. An additional requirement is to develop applications natively-scalable, able to automatically scale up as the usage and the amount of data grow. Last but not least the application must be usable from different devices, laptops or mobile devices, allowing the users to collaborate efficiently through the apps.
For a successful application, it is crucial not only how the software has been developed but also the choice made about the architecture and platforms. Google Cloud powerful tools allow us to develop web apps satisfying the requirements above.
We think modern applications must support automatic update of data on tables and documents where multiple users are collaborating and easily handle users’ authentication and authorization.
The tools
Tools like Google Firebase allow developers to focus on the implementation of the business logics without infrastructure concerns.
In this article, we will give some technical detail with an example on how to develop an application based on Firebase, Angular and Typescript.
Assuming you know Angular and Typescript – if not we suggest to check Typescript here and Angular here – we’ll give instead a short introduction on Firebase, which is focus of this article.
Firebase is an ecosystem of tools that has been acquired by Google for the development of both mobile and web applications. One of the ecosystem’s tools, Firestore, is particularly powerful as it is a distributed database that allows to build front-end real-time applications without having too much trouble dealing with the communication with the database in order to keep the front-end up to date with the data.
The client library of Firestore handles transparently the calls to the database and together with the rxJs observables – the library on top of which Angular is built- it is possible to keep the data view up to date without having to deal with every single detail on how this works.
This said, let’s now see where to start to create our first web app on Firebase using the Angular framework and the Javascript extension Typescript. Enjoy the coding!
The elements to build a simple app
In order to show the power of the tools presented above, we will build a simple app for handling a simple task list. First of all we need to make sure that few pre-requirements are fulfilled:
- Install npm if not already installed on your system.
- create a new Firebase project on the Firebase console
- Install on your local system the Firebase command line interface (cli) following the instructions on the available Google online guide. For the installations we suggest to use the node package manager (npm).
- If not already installed, install the Angular cli with the following command:
sudo npm install -g @angular/cli
After that, let’s create a folder for your project and create the new angular app with the command:
ng new demo-ws
“demo-ws” is the name of our new project.
This command will create a skeleton of the project in your project folder. We won’t analyze here the skeleton structure but we suggest to follow the Angular bible if you want to dive deeper into details.
Once the project is created, we can move into the demo-ws folder and run the command:
ng serve –open
our Angular app will be opened on your default browser.
Now that we have a running Angular app, let’s see how we can integrate Firebase in order to get the data directly in our application.
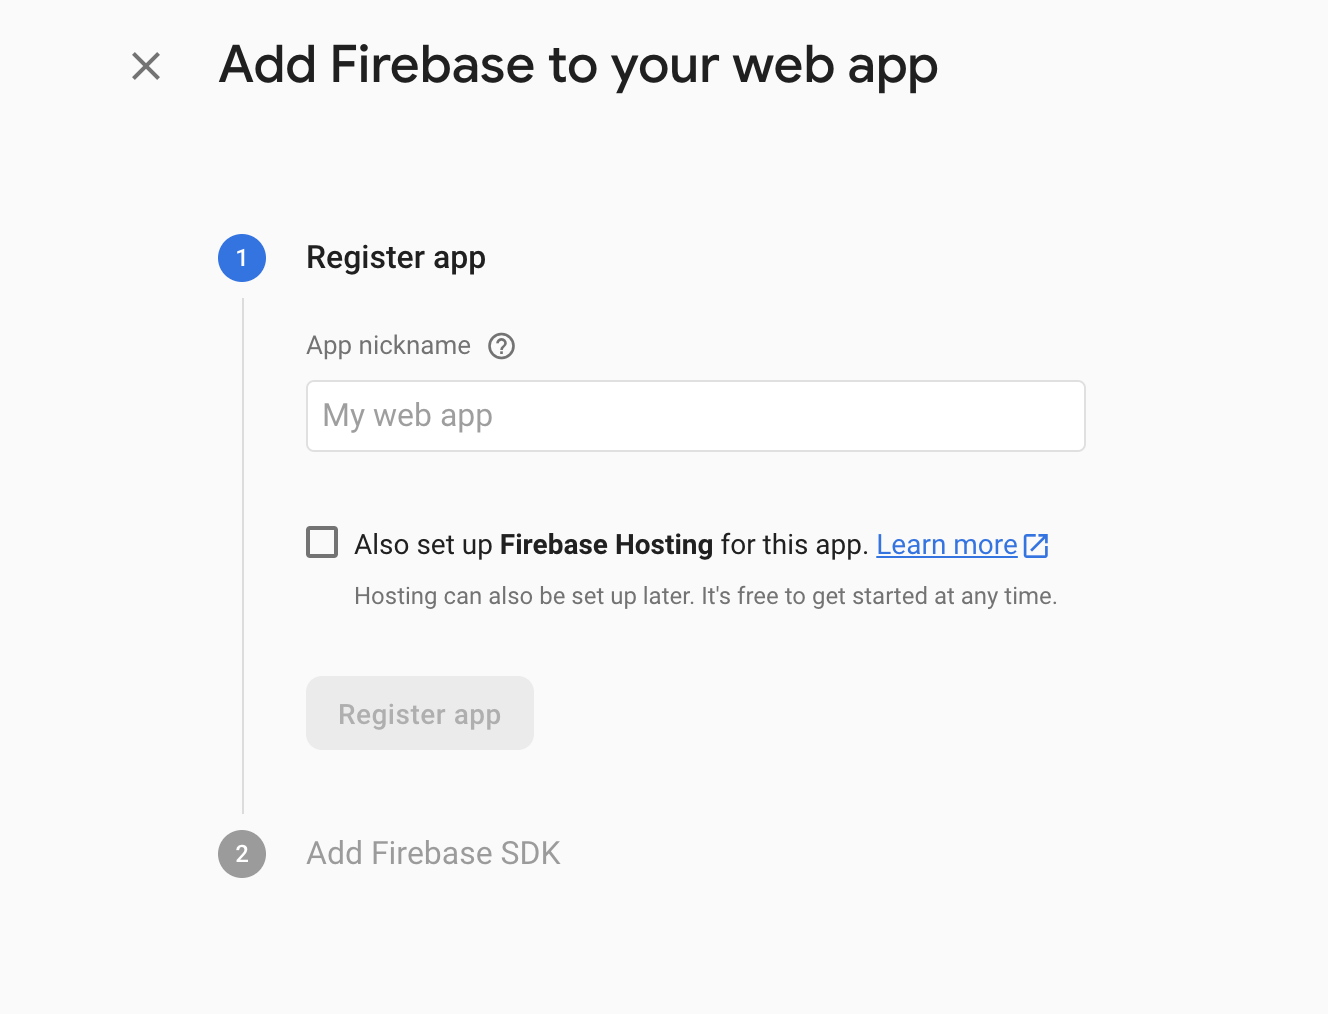
Moving on the Firebase interface,we can register the app by clicking on: “Project view” -> “Your apps” and select the platform to get started. We will choose to work with a web application (</>).

Add Firebase to your web app
At the end of the registration procedure we will get the code to be inserted into the environment.ts file (src/environments/environment.ts):
// Your web app’s Firebase configuration var firebaseConfig = {
apiKey: “****************”, // place your apiKey here
authDomain: “***********”,
databaseURL: “***********”,
projectId: “***********”,
storageBucket: “***********”,
messagingSenderId: “***********”,
appId: “*****************************”,
};
// Initialize Firebase
firebase.initializeApp(firebaseConfig);
The next step is the installation of the official Firebase library, running the command:
npm i –save firebase angularfire2
Additional information about the angularfire2 library is available here.
Firebase integration
Now we are finally ready to write the first page of our app, where we want to show a list of tasks.
Let’s modify the file src/app/app.module.ts as follows:
import { Component } from ‘@angular/core’;
import { AngularFirestore } from ‘angularfire2/firestore’;
import { Observable } from ‘rxjs’;
export interface Task {
dueTime: Date,
description: string,
}
@Component({
selector: ‘app-root’,
templateUrl: `./app.component.html`
})
export class AppComponent {
public tasks: Observable<Task[]>;
constructor(db: AngularFirestore) {
this.tasks = <Observable<Task[]>>db.collection(‘tasks’).valueChanges();
console.log(this.tasks);
}
}
Make sure that you correctly imported the necessary modules (AngularFirestoreModule e AngularFireModule) in app.module.ts as shown below:
import { BrowserModule } from ‘@angular/platform-browser’;import { NgModule } from ‘@angular/core’;
import { AppComponent } from ‘./app.component’;
import { environment } from ‘../environments/environment’;
import { AngularFirestoreModule } from ‘angularfire2/firestore’;
import { AngularFireModule } from ‘angularfire2’;
@NgModule({
declarations: [
AppComponent
],
imports: [
BrowserModule,
AngularFireModule.initializeApp(environment, ‘demo-ws’),
AngularFirestoreModule
],
providers: [],
bootstrap: [AppComponent]
})
export class AppModule { }
The reason why this is necessary is outside the scope of this article as it concerns Angular organization in modules/components. More details about the modules organizations in Angular can be found here
Going back to the app, now we can change the file app.component.html. That is the file containing the view of our application and that allows to show the task list on the browser:
<ul>
<li *ngFor=”let task of tasks | async”>
<pre>{{ task.description }} to complete before: {{ task.dueTime.toDate() | date: ‘dd MMM hh:mm’ }}</pre>
</li>
</ul>
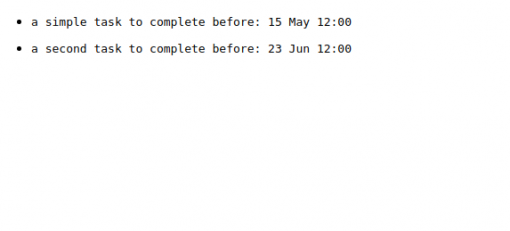
Once this file is saved, the Angular process will intercept that a new version of a file is available and will reload the app on the browser with the latest changes. You will then notice that the page is empty. Why? Don’t panic, everything is working as expected. We didn’t add any data on the database yet!
It will be enough to go on the Firebase console, in the Firestore application page, and create a new collection “tasks” containing at least 1 element:

Firestore application page
The magic is that the task will appear now automatically on the app in real-time, without the need to reload the page!

What about security and access management? In the “rules” tab of the Firestore console you can configure the database access rules.
Firestore proposes two default rules when you create a database that you can later change: the production mode blocks any access to the database and you will need to add your own authentication layer in order to allow the users to access the data. On the other hand, the test mode will allow us to open the database, for development and testing purposes, for a configurable limited time.
rules_version = ‘2’;
service cloud.firestore {
match /databases/{database}/documents {
match /{document=**} {
allow read, write: if true;
}
}
}
More details on the Firestore security rules can be found on the official guide
In conclusion
Now the skeleton of your app is ready and can be further developed adding the typical CRUD functionalities to add, delete and update tasks. But this is an exercise we’ll leave to you.
Happy coding!
Davide Savio
Full-Stack developer @Wondersys


